
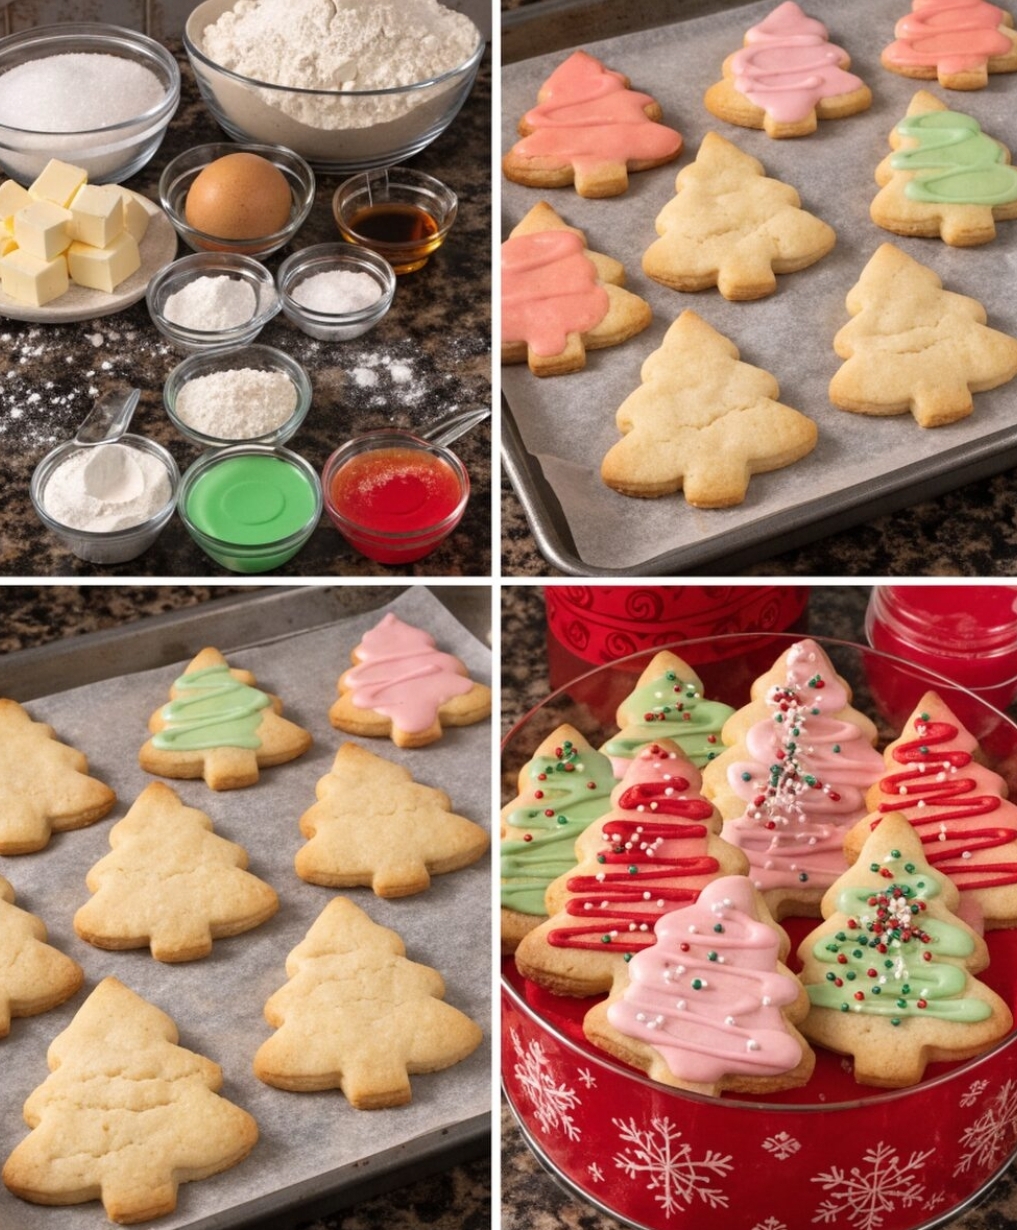
Irresistible Christmas Tree Sugar Cookies
There’s nothing quite like the magic of homemade Christmas cookies to fill your home with cheer and delicious aromas. These adorable Christmas tree sugar cookies are not just a treat for the taste buds, but also a feast for the eyes! With their rich buttery flavor and festive decorations, they are truly irresistible and destined to become a beloved holiday baking tradition for your family.
Making these classic sugar cookies is a joyful activity, perfect for getting into the holiday spirit. From mixing the simple ingredients to cutting out the fun Christmas tree shapes and, of course, decorating them with vibrant icing and colorful sprinkles, every step is a delight. Whether you’re an experienced baker or new to cookie making, this easy-to-follow recipe will guide you to perfect, cute Christmas cookies that everyone will rave about.
Why You’ll Love This Recipe
- Classic Flavor: These cookies boast that beloved buttery vanilla taste that makes sugar cookies so comforting and delicious.
- Festive & Fun: Shaped like Christmas trees and decorated with bright icing and sprinkles, they are incredibly cute and perfect for holiday gatherings.
- Great for Gifting: Pack them into a festive tin, and you have a beautiful, homemade gift for friends, family, or neighbors.
- Family-Friendly Activity: The decorating part is especially fun for kids and adults alike, making it a wonderful holiday tradition.
- Versatile Decoration: While we suggest specific colors and sprinkles, you can get creative with your own designs and colors.
Ingredients
Making delicious Christmas sugar cookies starts with a few basic, high-quality ingredients. Here’s what you’ll need to create these festive treats:
- For the Cookies:
- 2 ½ cups all-purpose wheat flour
- 1 cup unsalted butter, softened
- 1 cup granulated sugar
- 1 large egg
- 1 teaspoon vanilla extract
- ½ teaspoon baking powder
- ¼ teaspoon salt
- For the Icing & Decoration:
- 2 cups powdered sugar
- 2-4 tablespoons milk (or water)
- 1 teaspoon vanilla extract
- Red, green, and pink gel food coloring
- Assorted Christmas sprinkles (red, green, white nonpareils)
Ingredient Notes
- Butter: Ensure your unsalted butter is at room temperature. This is crucial for achieving a smooth, well-combined dough and prevents overmixing.
- Flour: All-purpose wheat flour is ideal for these cookies, providing the perfect texture. Sifting isn’t strictly necessary but can help create a lighter cookie.
- Vanilla Extract: Use good quality vanilla extract for the best flavor. It truly makes a difference in classic sugar cookie recipes.
- Powdered Sugar: Also known as confectioners’ sugar, this is essential for a smooth, lump-free icing.
- Food Coloring: Gel food coloring provides more vibrant colors without thinning the icing too much, which is important for decorating.
How to Make Christmas Tree Sugar Cookies
Follow these steps to bake and decorate your beautiful Christmas tree sugar cookies:
- Cream Butter and Sugar: In a large mixing bowl, cream together the softened butter and granulated sugar until light and fluffy. This usually takes 2-3 minutes with an electric mixer.
- Add Egg and Vanilla: Beat in the egg and vanilla extract until well combined. Scrape down the sides of the bowl as needed.
- Combine Dry Ingredients: In a separate bowl, whisk together the all-purpose flour, baking powder, and salt.
- Gradually Add Dry to Wet: Slowly add the dry ingredients to the wet ingredients, mixing on low speed until just combined. Be careful not to overmix, as this can make the cookies tough. The dough should be soft but not sticky.
- Chill the Dough: Divide the dough in half, flatten each half into a disk, wrap tightly in plastic wrap, and refrigerate for at least 30 minutes, or up to 2 hours. Chilling helps prevent the cookies from spreading too much during baking.
- Preheat Oven & Prepare Baking Sheets: Preheat your oven to 375°F (190°C). Line baking sheets with parchment paper.
- Roll and Cut Cookies: On a lightly floured surface, roll out one disk of chilled dough to about ¼-inch thickness. Use a Christmas tree cookie cutter to cut out shapes. Carefully transfer the cutouts to the prepared baking sheets. Reroll any scraps and cut more cookies.
- Bake: Bake for 8-10 minutes, or until the edges are lightly golden. Baking times may vary, so keep an eye on them.
- Cool: Let the cookies cool on the baking sheets for a few minutes before transferring them to a wire rack to cool completely. They must be completely cool before icing.
- Prepare Icing: In a medium bowl, whisk together the powdered sugar, 2 tablespoons of milk (or water), and vanilla extract until smooth. Add more milk, a teaspoon at a time, until you reach a consistency that is thick enough to drizzle but still flows smoothly.
- Color Icing: Divide the icing into separate small bowls. Add a drop or two of red, green, and pink gel food coloring to each bowl and mix until the desired color is achieved.
- Decorate Cookies: Once the cookies are completely cool, spoon the colored icing into small piping bags (or use a spoon for drizzling). Decorate the Christmas tree cookies with colorful drizzles and immediately sprinkle with assorted Christmas sprinkles before the icing sets.
- Allow Icing to Set: Let the decorated cookies sit at room temperature for at least 30 minutes, or until the icing has fully set, before stacking or storing.
Helpful Baking Tips
- Don’t Overmix: Overmixing the dough develops gluten, leading to tougher cookies. Mix just until the ingredients are combined.
- Chill Thoroughly: Chilling the dough is essential for firm cookies that hold their shape. Don’t skip this step!
- Even Thickness: Roll your dough to an even thickness for consistent baking. A rolling pin with thickness guides can be very helpful.
- Parchment Paper: Using parchment paper prevents sticking and makes cleanup a breeze.
- Cool Completely: Attempting to ice warm cookies will result in melted, messy icing. Patience is key!
Ingredient Substitutions
- Gluten-Free Flour: You can substitute all-purpose flour with a 1:1 gluten-free baking blend for a gluten-free version. Results may vary slightly in texture.
- Dairy-Free Butter: Use a high-quality dairy-free butter substitute to make these cookies dairy-free.
- Almond Extract: For a slightly different flavor profile, you can swap half of the vanilla extract for almond extract.
- Powdered Sugar Icing Alternative: For a quicker decoration, you can use store-bought cookie icing tubes, though homemade often tastes better.
Variations
- Citrus Zest: Add 1-2 teaspoons of lemon or orange zest to the dough for a bright, zesty flavor.
- Spiced Cookies: Incorporate ½ teaspoon of cinnamon or a pinch of nutmeg into the dry ingredients for a warm, spiced sugar cookie.
- Chocolate Dipped: Instead of icing, dip half of the cooled cookies in melted white or dark chocolate and decorate with sprinkles.
Serving Suggestions
These Christmas tree sugar cookies are perfect for so many holiday occasions. Serve them on a festive platter at your holiday party, enjoy them with a warm cup of hot cocoa or coffee, or pack them up in a beautiful decorative red cookie tin as a thoughtful homemade gift. They are also a wonderful treat to leave out for Santa!
Storage and Reheating
- Storage: Store the decorated Christmas sugar cookies in an airtight container at room temperature for up to 5-7 days. If stacking, place parchment paper between layers to prevent the icing from sticking.
- Freezing Dough: You can freeze the unbaked cookie dough for up to 3 months. Wrap it tightly in plastic wrap, then place it in a freezer-safe bag. Thaw in the refrigerator overnight before rolling and baking.
- Freezing Baked Cookies: Baked, undecorated cookies can be frozen for up to 3 months. Once cooled, place them in a single layer on a baking sheet to freeze solid, then transfer to a freezer-safe container or bag. Thaw at room temperature before decorating.
Frequently Asked Questions
Can I make the cookie dough ahead of time?
Yes, absolutely! The cookie dough can be made up to 2-3 days in advance and stored in the refrigerator, tightly wrapped. This can make your holiday baking less stressful.
Why are my cookies spreading too much?
Cookies usually spread too much if the butter was too warm, the dough wasn’t chilled long enough, or there wasn’t enough flour. Make sure your butter is just softened, not melted, and chill the dough as recommended.
How can I get vibrant icing colors?
Using gel food coloring rather than liquid food coloring will give you much more vibrant and concentrated colors without adding too much moisture to your icing. A little goes a long way!
Can I use royal icing instead of powdered sugar icing?
Yes, you can definitely use royal icing for these cookies. Royal icing provides a harder, more professional finish and allows for more intricate decorating details, but it does take longer to prepare and set.
Final Recipe Notes
These Christmas tree sugar cookies are more than just a dessert; they’re a centerpiece of holiday cheer. The process of making them, from the simple act of combining ingredients to the artistic joy of decorating, creates lasting memories. Their buttery taste and charming appearance make them a truly special treat that embodies the spirit of the season. So gather your ingredients, put on some festive music, and create these delightful cookies that are sure to bring smiles to everyone who tries them. Happy baking!
Ingredients
- 2 ½ cups all-purpose wheat flour
- 1 cup unsalted butter, softened
- 1 cup granulated sugar
- 1 large egg
- 1 teaspoon vanilla extract
- ½ teaspoon baking powder
- ¼ teaspoon salt
- 2 cups powdered sugar
- 2-4 tablespoons milk (or water)
- 1 teaspoon vanilla extract
- Red, green, and pink gel food coloring
- Assorted Christmas sprinkles (red, green, white nonpareils)
Instructions
- Cream Butter and Sugar: In a large mixing bowl, cream together the softened butter and granulated sugar until light and fluffy. This usually takes 2-3 minutes with an electric mixer.
- Add Egg and Vanilla: Beat in the egg and vanilla extract until well combined. Scrape down the sides of the bowl as needed.
- Combine Dry Ingredients: In a separate bowl, whisk together the all-purpose flour, baking powder, and salt.
- Gradually Add Dry to Wet: Slowly add the dry ingredients to the wet ingredients, mixing on low speed until just combined. Be careful not to overmix, as this can make the cookies tough. The dough should be soft but not sticky.
- Chill the Dough: Divide the dough in half, flatten each half into a disk, wrap tightly in plastic wrap, and refrigerate for at least 30 minutes, or up to 2 hours. Chilling helps prevent the cookies from spreading too much during baking.
- Preheat Oven & Prepare Baking Sheets: Preheat your oven to 375°F (190°C). Line baking sheets with parchment paper.
- Roll and Cut Cookies: On a lightly floured surface, roll out one disk of chilled dough to about ¼-inch thickness. Use a Christmas tree cookie cutter to cut out shapes. Carefully transfer the cutouts to the prepared baking sheets. Reroll any scraps and cut more cookies.
- Bake: Bake for 8-10 minutes, or until the edges are lightly golden. Baking times may vary, so keep an eye on them.
- Cool: Let the cookies cool on the baking sheets for a few minutes before transferring them to a wire rack to cool completely. They must be completely cool before icing.
- Prepare Icing: In a medium bowl, whisk together the powdered sugar, 2 tablespoons of milk (or water), and vanilla extract until smooth. Add more milk, a teaspoon at a time, until you reach a consistency that is thick enough to drizzle but still flows smoothly.
- Color Icing: Divide the icing into separate small bowls. Add a drop or two of red, green, and pink gel food coloring to each bowl and mix until the desired color is achieved.
- Decorate Cookies: Once the cookies are completely cool, spoon the colored icing into small piping bags (or use a spoon for drizzling). Decorate the Christmas tree cookies with colorful drizzles and immediately sprinkle with assorted Christmas sprinkles before the icing sets.
- Allow Icing to Set: Let the decorated cookies sit at room temperature for at least 30 minutes, or until the icing has fully set, before stacking or storing.
- Prep time: 30 minutes
- Cook time: 10 minutes
- Total time: 1 hour 10 minutes
- Servings: 24 cookies