🍫 No-Bake Chocolate Peanut Butter Crunch Bars: The Ultimate Easy Dessert! 🥜
Page 1: Introduction, Ingredients, and Equipment
🤤 The Sweetest, Easiest Treat You’ll Ever Make!
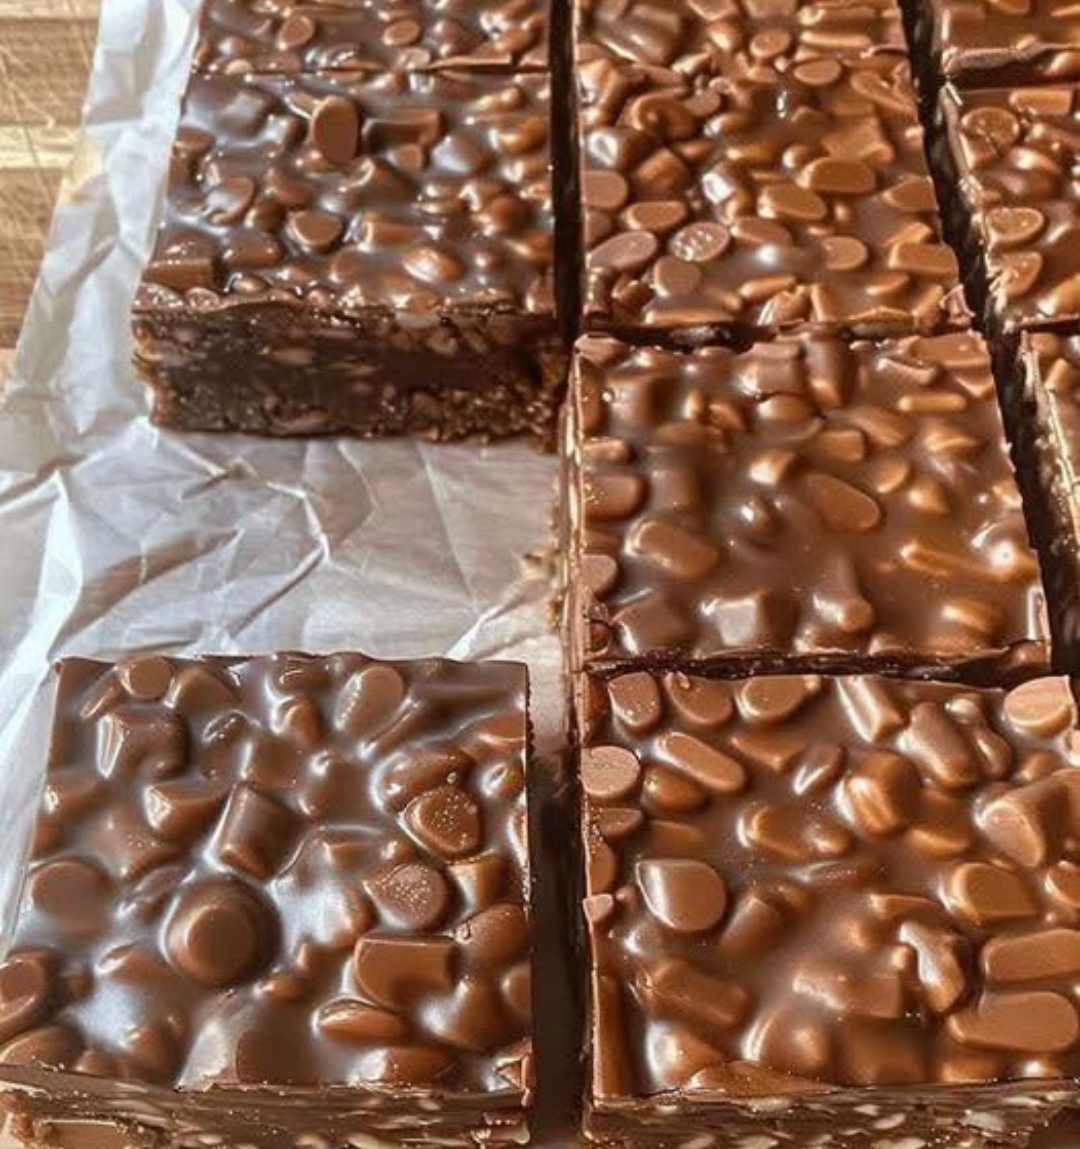
Tired of complicated baking? Craving a rich, chocolatey, and delightfully crunchy dessert that requires zero oven time? Look no further! These No-Bake Chocolate Peanut Butter Crunch Bars are the answer to your sweet tooth’s deepest desires. They are incredibly simple to make, perfect for parties 🎉, potlucks 🧺, or a cozy movie night in 🍿. With a creamy, peanut-buttery base and a generous, chip-studded chocolate topping (just like the picture! 😍), this recipe is a guaranteed crowd-pleaser and will become your new go-to dessert. Let’s get started on this journey to crunchy, chocolatey heaven! 💖
🛒 Ingredients: What You’ll Need
This recipe uses simple pantry staples. Remember to use high-quality ingredients for the best flavour!
For the Crunchy Peanut Butter Base:
Ingredient Quantity Notes
Butter 🧈 1 cup (226g) Unsalted, melted.
Peanut Butter 🥜 1 $\frac{1}{2}$ cups (375g) Creamy or crunchy, your preference! (Creamy recommended for smoother base).
Icing Sugar 2 cups (240g) Also known as powdered sugar. Sifted is best!
Rice Krispies 🍚 4 cups (112g) Or similar crispy rice cereal for the ultimate crunch.
Vanilla Extract 1 teaspoon For an extra layer of flavour.
For the Rich Chocolate Topping:
Ingredient Quantity Notes
Milk Chocolate Chips 🍫 1 $\frac{1}{2}$ cups (255g) The main chocolate for a smooth melt.
Peanut Butter 🥜 $\frac{1}{2}$ cup (125g) To thin the chocolate and add flavour.
Mini Chocolate Chips (or Chocolate-Coated Candies) $\frac{1}{2}$ cup (85g) For that signature, chip-studded look from the photo! ✨
Essential Equipment
You won’t need much!
9×13 Inch Baking Pan (or an 8×8 for thicker bars) 📏
Parchment Paper (very important for easy removal!) 📜
Large Mixing Bowl 🥣
Microwave-Safe Bowl (or a double boiler)
Spatula or Wooden Spoon
Measuring Cups and Spoons 🥄
Page 2: Step-by-Step Instructions & Pro Tips
📝 Let’s Get Cooking (Without the Oven!)
Follow these simple steps to create your decadent chocolate crunch bars!
Step 1: Preparing the Pan and Melting the Butter
Line your 9×13 inch baking pan with parchment paper, ensuring the paper hangs over the sides (this creates “handles” for later!). This is the secret to easy cleanup and cutting! 🧺
In a large, microwave-safe bowl, melt the butter 🧈. Heat in 30-second intervals until fully liquid.
Step 2: Creating the Peanut Butter Base
To the melted butter, add the 1 $\frac{1}{2}$ cups of peanut butter 🥜 and the vanilla extract. Stir until smooth and well combined.
Gradually add the icing sugar (powdered sugar) 🌬️ to the peanut butter mixture. Mix on low speed if using a mixer, or stir with a spatula until fully incorporated. The mixture will be thick!
Gently fold in the Rice Krispies cereal 🍚. Mix until the cereal is evenly coated with the peanut butter mixture. Be careful not to crush the cereal! We want that CRUNCH.
Step 3: Pressing the Base
Transfer the base mixture into your prepared pan.
Use a spatula or the back of a spoon to firmly and evenly press the mixture into the bottom of the pan. Make sure it’s smooth and compact from edge to edge. A neat base makes for neat bars! ✨
Place the pan in the refrigerator ❄️ while you prepare the topping.
Step 4: Making the Rich Chocolate Topping
In a separate microwave-safe bowl, combine the 1 $\frac{1}{2}$ cups of milk chocolate chips 🍫 and the $\frac{1}{2}$ cup of peanut butter.
Microwave on medium power (50-60%) in 30-second intervals, stirring well after each interval, until the mixture is completely smooth and glossy. Alternatively, melt over a double boiler. DO NOT overheat the chocolate! 🔥
Once melted, let the chocolate cool slightly for 1-2 minutes. This prevents the base from melting when you pour it on.
Step 5: Finishing the Bars
Pour the warm chocolate mixture evenly over the chilled peanut butter base. Spread it gently with a spatula to cover the entire surface.
Immediately sprinkle the top generously with the $\frac{1}{2}$ cup of mini chocolate chips (or chocolate-coated candies) to achieve that stunning visual from the picture! 😍 Press them lightly into the melted chocolate.
Return the pan to the refrigerator 🥶 for at least 2-3 hours, or until the chocolate topping is completely set and hard.
💡 Chef’s Pro Tips for Perfection
Sifting: Sift your icing sugar! This prevents lumps and ensures a super smooth base.
The Cut: Once fully set, lift the bars out of the pan using the parchment paper handles. Place them on a cutting board and use a hot, sharp knife 🔪 (wiped clean between cuts) to slice into neat squares. This is key for those bakery-perfect edges!
Storage: Keep the bars stored in an airtight container 🌬️ in the refrigerator. They last for up to 1 week (if they aren’t all eaten by then! 😉).
Page 3: Nutritional Insights, Variations, and Conclusion
💯 Why This Recipe Is a Winner
Texture Heaven: The perfect contrast between the creamy, sweet base and the intensely crunchy, thick chocolate shell. 🤩
Time-Saver: Less than 30 minutes of active preparation time! ⏱️
Kid-Friendly: A fun and safe recipe for little ones to help with (since there’s no oven involved!). 👨👩👧👦
📊 Nutritional Snapshot (Estimation per Bar, approx. 24 bars)
Disclaimer: Nutritional information is an estimate based on standard ingredients and serving size.
Element Estimate
Calories 🔥 250 – 300 kcal
Total Fat 15 – 20g
Total Carbs 25 – 35g
Protein 5 – 7g
Sugar High (It’s dessert! Enjoy!) 😋
🔄 Delicious Variations to Try!
Feeling creative? Try these exciting twists on the classic recipe:
Salty Sweet Bars: Add 1 teaspoon of sea salt 🧂 to the chocolate topping before pouring. Sprinkle with flaky sea salt just after adding the mini chips. (Highly Recommended!)
Different Nut Butter: Swap the peanut butter for almond butter or sunflower seed butter (for a nut-free option). 🌻 Note: Texture may vary slightly.
Chocolate Swaps: Use dark chocolate chips for a richer, less-sweet bar. Pair with a drop of espresso powder in the chocolate for a mocha note! ☕
Add-ins: Fold in shredded coconut 🥥 or chopped pecans/walnuts into the peanut butter base for extra texture and flavour complexity!
📣 Final Thoughts: Your New Favorite Dessert!
These No-Bake Chocolate Peanut Butter Crunch Bars are more than just a simple sweet treat; they are a celebration of easy, satisfying indulgence. The picture-perfect, glossy chocolate layer speckled with crunchy chips promises a delightful bite every time. They are truly the easiest way to impress guests or simply treat yourself.
Enjoy your delicious, homemade creation! Happy no-baking!